
VCAT: Get off the "X" and Counter-Assault!
- paladintacticalus
- Sep 21, 2021
- 8 min read

Updated: May 9, 2025
In our VCAT 2 class, we discuss how ambushes are set-up and then how to counter them. In this blog post, I go over more detail for incoming VCAT 2 students to get ahead of the game or those who have taken the class and wish to reinforce the lessons.
Ambushes
In this section, I'll provide a brief summary of ambush theory. In the military, ambushes are usually conducted by a squad (approximately 10) or a platoon (approximately 40). As law enforcement officers, it is unlikely that you would face this level of threat, but not impossible (see the Deadly Day in Pine Ridge blog post regarding a 7-man ambush conducted against two FBI agents). In a realistic scenario, a law enforcement officer would likely face one or two adversaries in an attack. Whether it is a small or large ambush, the principles used to conduct the attack are similar.
Location
The first step in setting up an ambush is to determine the location of the attack. Below are some criteria for selecting of an ambush site:
There must be a high-probability that the target would travel along the route. For example, a target would regularly transit that particular route as part of a patrol. Alternatively, the ambusher could set up a scenario to lure the target onto that route.
The location should allow good visibility into the "kill zone" or "X." The ambusher wants a spot which provides a large field of fire with respect to the target. The terrain and type of vegetation dictates the field of fire. Excessive brush and trees narrows the field of fire and provides opportunities for the target to obtain cover if he survives initial contact.
The location would provide the ambusher with suitable concealment so that he would not be observed until the attack is initiated. The presence of cover (rocks, trees, reverse slope of a hill, etc.) would also be beneficial if the target is able to returns fire.
The location allows a safe withdrawal benefits an ambusher who intends to escape.
Law enforcement officers should study their routine patrol routes and determine where the most probable ambush sites are located. In times of heightened threat, officers should be cautious when transiting these areas of vulnerability.
Elements
The military designates three teams for conducting ambushes: Security, Support, and Assault. Team size for each element would range from a fire team (4) to squad size:
Security: Sets up at the outer bounds of the two other elements to provide an early warning of an attack on the ambush team.
Support: Upon initiation of the ambush, this element provides a mass of fire into the designated kill zone. This fire supports the movement of the Assault element. The Support element is usually remains stationary with respect to the target.
Assault: When the adversary has been suppressed, the assault team moves through the kill zone to neutralize any resistance. The assault team must coordinate with the support team to "lift fire" as the assault begins to avoid friendly fire casualties.
Configuration
Ambushes can be set up in a "linear form" or a "L-shape." The L-shape is preferred because it allows the ambush to be conducted from two-sides of the kill zone. An attack from two-sides is effective at defeating the efforts of the defenders to hide behind linear cover. For example in the diagram below for an "L-shape," an ambush is initiated at the 9:00 o'clock position. The targets may dismount and seek cover on the opposite side of the vehicle to shield themselves from the onslaught at their 9:00. However, in this location, they have entered the field of fire for a second set of ambushers located at their 12:00 o'clock. In this scenario, there is no place for the targets to seek cover around their vehicle.

Planning
The military designates ambushes as either hasty (spontaneous) or deliberate (planned). Law enforcement can face either type, but a deliberate ambush conducted by a trained individuals is difficult to overcome. Since this is a public forum, I won't go deeper into how these ambushes could be planned/conducted. We can discuss plausible scenarios and their ramifications during our VCAT 2 class.
Countering the Ambush
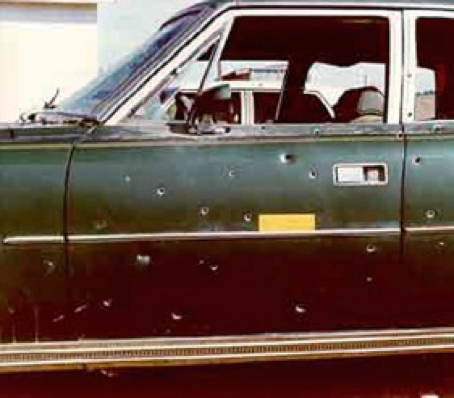
Upon initiation of the ambush, gunfire will be directed at you. This a dire situation primarily because you have limited mobility within the vehicle. Second, the vehicle offers limited ballistic protection (in our VCAT 1 class we explore the strengths/weaknesses of various areas of the vehicle). The first reaction should be to try to drive off the "X," whether driving forwards, backwards, or to the side. Fight in the kill zone only if the vehicle has been disabled or all paths are blocked.
Upon contact, we have the choice to first shoot from our vehicle at the attacker and then exit OR immediately exit the vehicle without firing. Whether you first engage from the vehicle before exiting depends on:
Can you see the threat from the vehicle? If not, exit the vehicle and attempt to locate the source of fire.
Can your weapon system reach the threat? Depending on your mission, you may or may not have a rifle ready to deploy against a far ambush. If you don't have a rifle immediately ready in the vehicle, your handgun will likely be ineffective against an ambusher several hundred yards away.
The only time it is advised to engage from the vehicle in a far ambush is if you can see the threat and can immediately employ a rifle or pistol to suppress the attacker's fire. You must be able to deliver overwhelming fire to put him on defense (i.e. prevent him from effectively firing on you). Once you've done so, dismount the vehicle as fast as you can, take cover, and then continue to return fire. Again, if you can't see the threat or ballistically reach the threat, then the first course of action must be to dismount the vehicle and take cover. Once you locate the source of fire, then return effective fire.
Here are the two courses of action summarized into VCAT "Battle Drills:"
Return fire, exit, take cover, and return fire
Exit, take cover, deploy rifle, and return fire
Some adhere to the tactic of crawling across the front seats to exit the door opposite of the attack. Depending on the vehicle's configuration, this may or may not be a good option. Crawling across the seat with a rifle or unholstered handgun will take a significant amount of time. You don't gain much protection because a single door is usually penetrated by both pistol and rifle rounds. An alternate approach is to simply exit on the same side and quickly move to cover/concealment. I recommend running a timed test for each method to determine the which course of action is best for your particular vehicle.
If you are with "friendlies," it's important to communicate information about the threat using the "Three Ds":
1) Distance: How far away is the adversary
2) Direction: Use cardinal directions (N, S, E, W) or clock bearing (e.g. 3 o'clock)
3) Description: "One shooter to the right of the rocks"
Keep Improving Your Position
Once you are out of the vehicle, you must constantly improve your position by constantly seeking better cover and concealment. As discussed in VCAT 1, there are points on the vehicle that offer limited protection; however, if you can find better cover away from the vehicle, take it. Nearby trees, rocks, reverse slopes of hills, etc. can be better options than your vehicle. However, if the terrain around the vehicle offers little cover and concealment, you may have to stay with the vehicle. Another important reason to move away from the vehicle is get off the "X." Remember, the attacker chose the kill zone because this area was within his field of fire. Moving away from the vehicle may put you into areas outside of his observation and ability to fire upon you.
Counter-Attack
Once you have bailed out of the vehicle, you have two divergent options: 1) break contact or 2) counterattack. In VCAT 2, we aggressively turn the tide of the fight in order to advance on the adversary and then neutralize the threat. In VCAT 3, we break contact and move away from the threat.
Three factors to consider when deciding to counter-attack are 1) volume of effective fire from the adversary, 2) proximity, and 3) terrain. If the attacker is directing effective fire, then it may be difficult to mount an effective counter-assault. Breaking contact may be the safest option; choose to live to fight another day. If the adversary is at a significant distance, it may be difficult to close the space in enough time before he breaks contact and disappears. Finally, the terrain plays a major role in whether to counter-assault and, if so, how that movement will be accomplished (see below).
Finally, an important consideration is "What is my mission?" If you are a law enforcement officer, whether you choose to counter-assault or break contact depends on your mission. An ambush on a patrol officer will likely demand a strong reaction in order to apprehend the aggressor. Responding units will stream in to address the threat while setting up a perimeter. Alternatively, in an executive protection operation, the goal is to remove the principal to safety. In this case, your team would not pursue the adversary, but leave it to follow-on elements to address the attacker. As a citizen, your "mission" is self-preservation. Once you get out of the kill zone, it is recommended that you move safely AWAY from the aggressor rather than counter-assault.
In military doctrine, it's recommended that you advance on an adversary having at least a 3:1 advantage in personnel. In VCAT 2, our drills are designed for a 2:1 advantage. This is the absolute minimum ratio needed in a counter-attack.
Just like the "L- shaped" ambush described above, the optimal goal for a counter-assault is to move into an "L" position against the adversary. With you and your partner in an "L," the ambusher has to fight you in two directions and his ability to stay behind cover/concealment is compromised.

However, terrain may not let you accomplish an "L" shape. For example, on a city street where buildings line the roadway, you may not be able to achieve an "L." In a rural setting, you may be in a valley bounded by steep hills which would prevent a flanking movement. In this case, the terrain forms a channel in which you must move through. Not unlike operating in a hallway, this is a dangerous situation.

Fire-and-Manuever
Once you and your partner are out of the vehicle, communicate whether you will conduct a counter-assault or break-contact. If you choose to counter-assault, a simple "Flank Right" or "Flank Left" is all that it takes to initiate an "L" shape attack. If you need to slug it out down the channel because of the terrain, then communicate that you will conduct "bounding overwatch" to move toward the adversary. Bounding techniques can also be used to move away from the adversary (break contact) or laterally with respect to the adversary (to move to a better avenue of approach).
In either case, one officer will establish a "base of fire" to provide an opportunity for his partner to move. Fire directed at the adversary should make it difficult for him to observe, aim at, and fire upon the moving officer. This base of fire is 1) controlled in rate and 2) directed at the threat. This is not a full-auto blast in his direction. Officers must account for every round fired from his/her firearm.
Once the base of fire is active, the moving officer must consider the following things before leaving his cover:
Where is the adversary?
What is my final flanking position to neutralize the adversary?
What is the next intermediate position I need to move to (on the way to the final flanking position)?
During the movement to the next position, will I expose myself to incoming fire for a period greater than 3 seconds? If so, consider a different option.
Will my partner be able to adequately cover this next move?
Will I cross over my partner's fire (or any arriving officer's fire) on this next move?
Here is an example of bounding overwatch during a VCAT class:
For more detail on Ambushes: https://www.youtube.com/watch?v=ESzB7JbcEe8
For more information on Fire-and-Manuever: 1) https://www.youtube.com/watch?v=Ngq3NID07gE 2) https://www.youtube.com/watch?v=1cCzNHZ7J80


Comments